• Home
  • Indoor Bonsai
  • Outdoor Bonsai
  • Bonsai Styles
  • Bonsai Care
  • Bonsai Training
  • Bonsai Pots
  • Bonsai Tools

How to Take Care of a Bonsai Tree

Your One-Stop Guide on How to Grow a Bonsai Tree

Step by step guide how to pick a pre-bonsai or nursery plant

March 20, 2014 by Bonsai Tree Care Leave a Comment

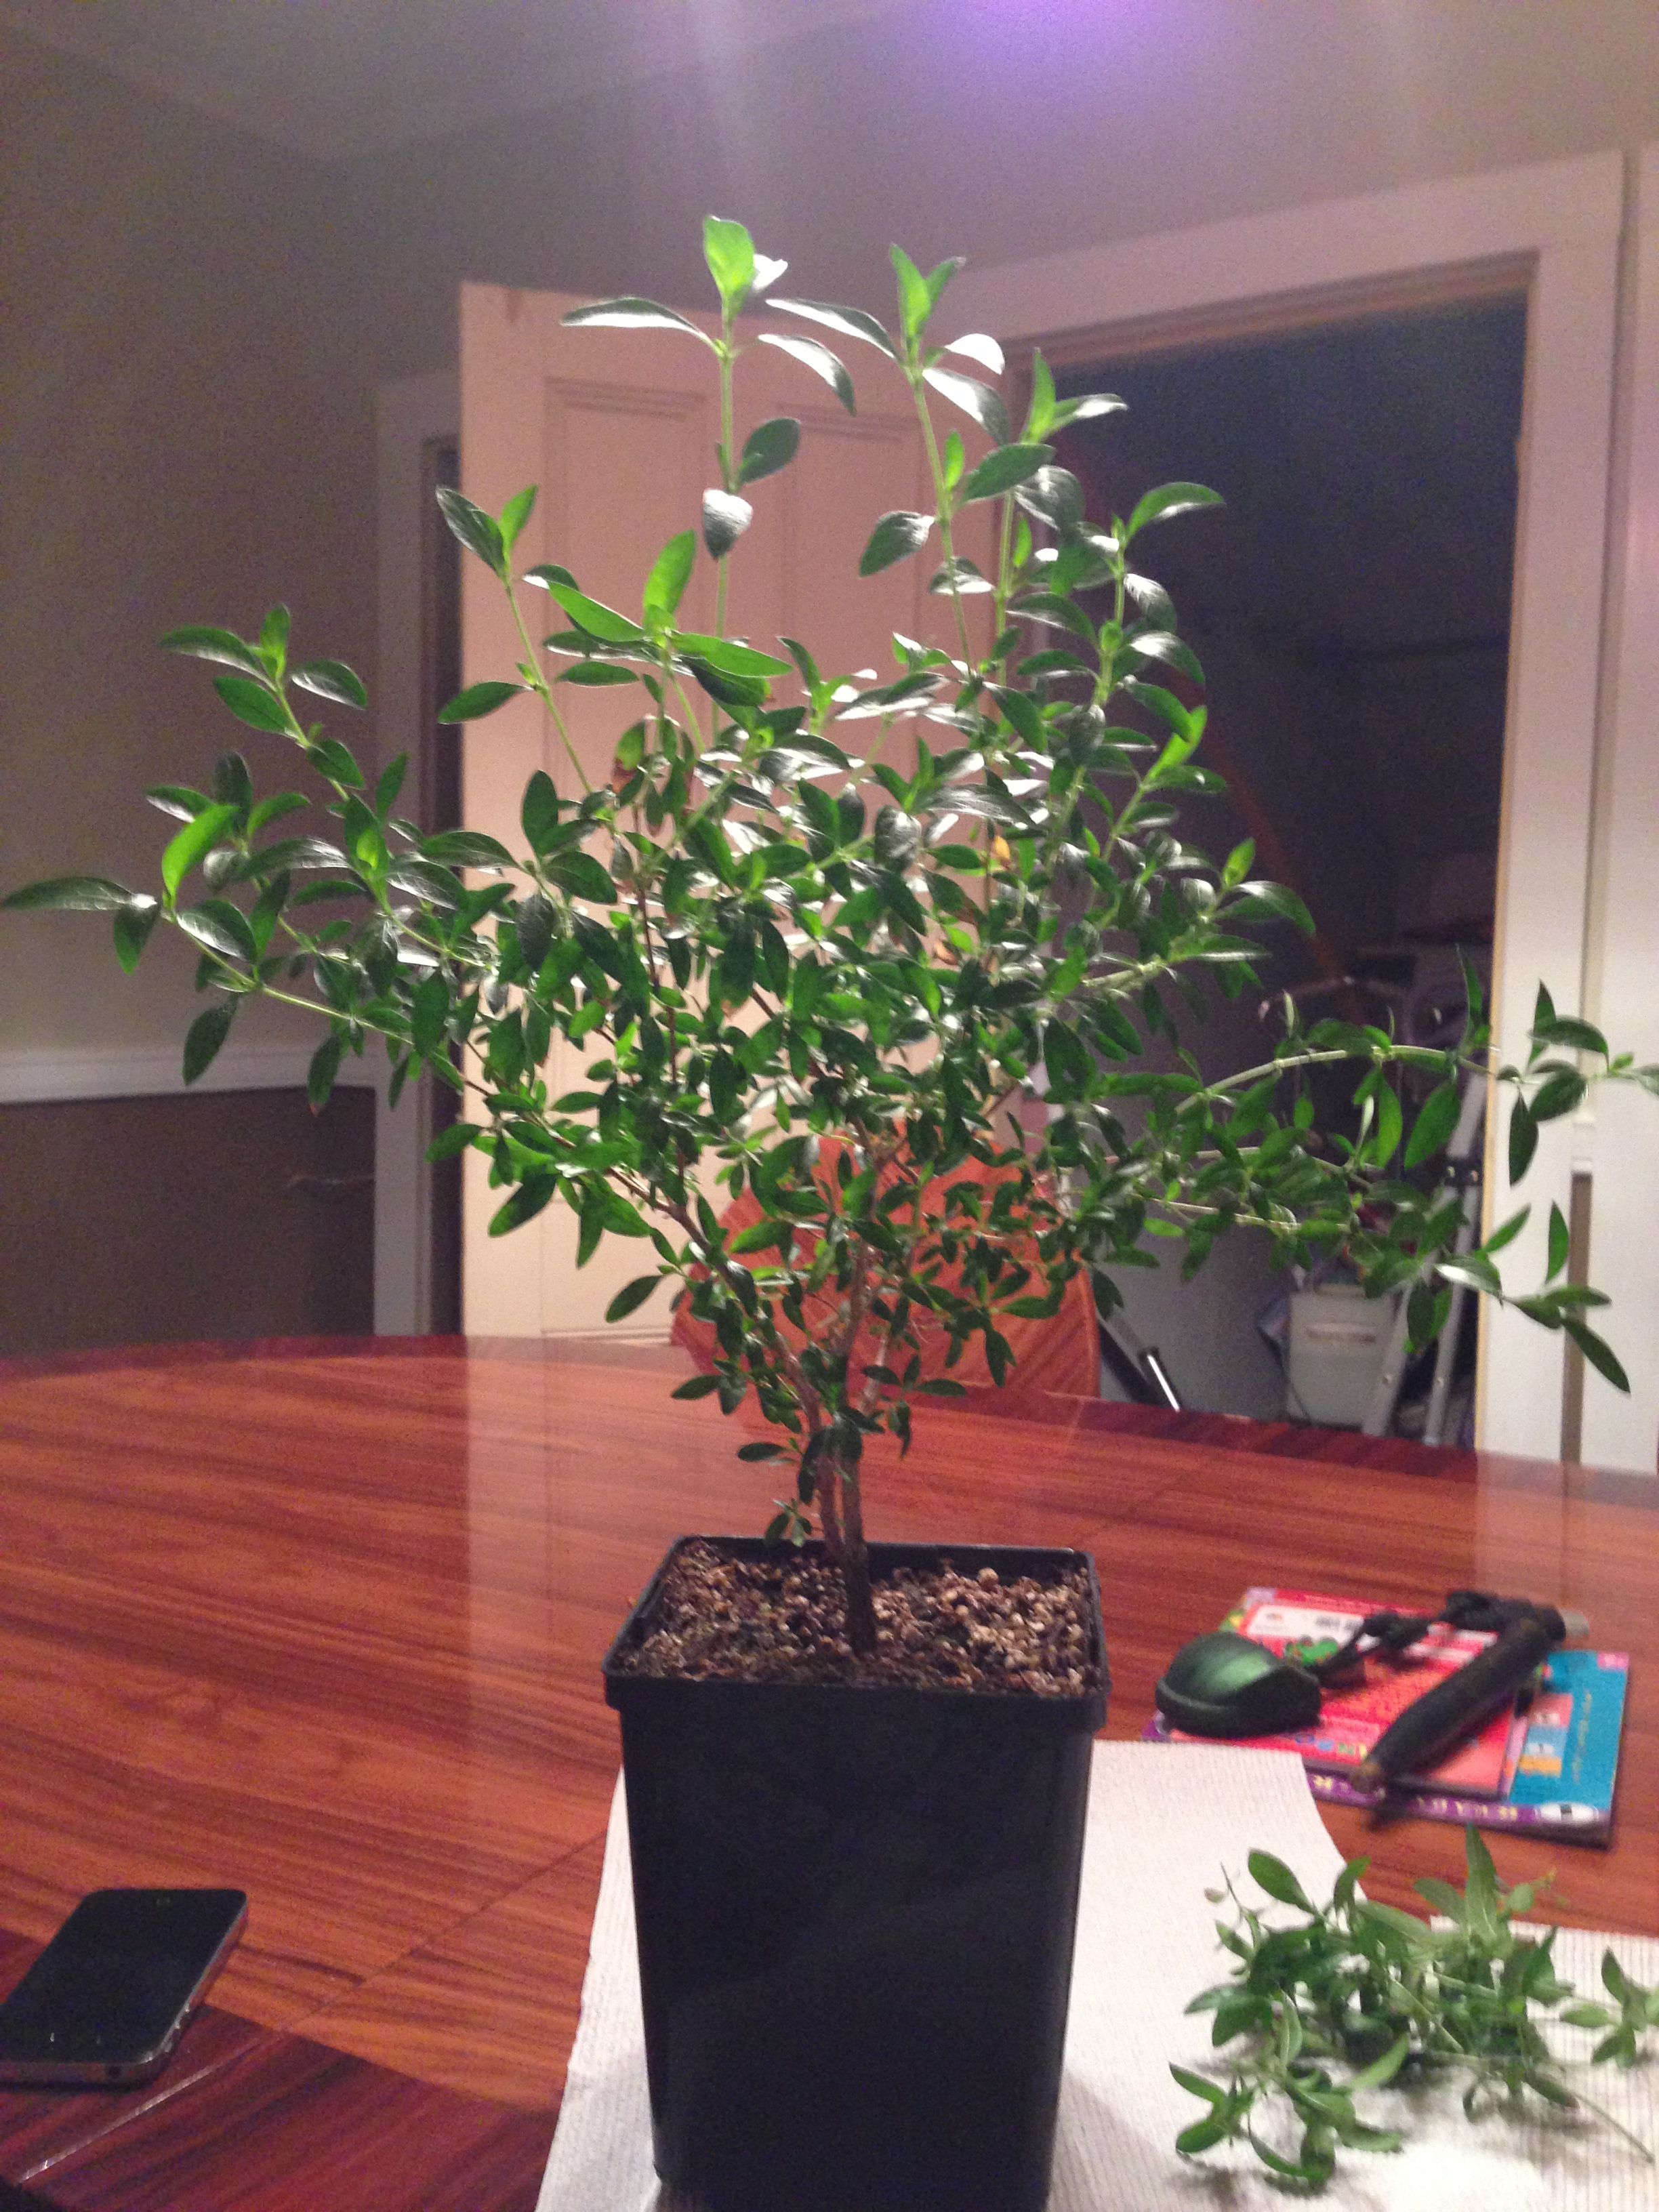
One of the fastest ways to jump into bonsai training it to purchase a pre-bonsai tree or a nursery stock plant.  You can find pre-bonsai online at the link at the bottom of this page, while nursery stock can be purchased at your local plant nursery store.  We do this a few times a year to create a bonsai in a very short time.  You purchase the tree or shrub, trim it to the style you desire, and let it recover.  This is as easy as it gets, as long as you select the right plant to begin with.  This step-by-step guide will show you how to pick the perfect bonsai candidate.

  1. The first thing to look for in creating a bonsai from a stock tree is the plant species.  You want to make sure that the plant is suitable for bonsai training.  Most trees and shrubs are suitable, but it is important do some research first.
  2. Look at the size of the tree.  You can’t walk into a nursery and purchase a 10’ Japanese maple with the goal of making it a bonsai; it’s just not going to work.
  3. Now start looking at the characteristics of the plant, starting with the trunk.  Pick a plant that has a truck that can be styled into a bonsai style.  You will need to envision the finished result at this point.
  4. Next, look at the tapering of the trunk.  Almost all bonsai styles require the trunk to taper from thick on the bottom to thin at the top.  You do not want the plant to stay one thickness to a point that was cut off.  This will make the finished result look unnatural and rushed.
  5. Observe the branching structure of the tree next.  Look at where the branches lie, what direction they are going, and if they are tapered.  You will most likely be trimming some branches so they don’t all need to be perfect.  Just make sure that you have a few that you can work with.
  6. The last thing to look at is “nabari”, or the root flare and surface roots.  The point where the trunk meets the dirt is essential in making the bonsai look natural.  You want this to look very natural, with surface roots appearing at the base if possible.


Tips:

Purchase these plants in early spring.  This will allow you to trim and repot them right away.  After trimming, let them recover all year until next spring and you will have a great bonsai.

Try to envision the finished result.  This will make it much easier to decide what is going to work and what won’t.

Another good time to do this is in the fall, when nurseries are trying to sell off the leftover plants for cheap.  Purchase them then and let them be until spring.

Filed Under: Propagation Tagged With: buy, pre-bonsai, training

Step by Step Guide to Growing Bonsai from Cuttings in Dirt

March 17, 2014 by Bonsai Tree Care 2 Comments

Plants have the amazing ability to recover from almost anything under the right conditions.  One of the easiest ways to reproduce a bonsai for FREE is to grow it from cuttings.  In this process, you place a small limb that you cut off into the dirt, and over time it will grow its own roots.  This is very common in plant nurseries because you can mass produce plants for very little cost.  They also use this technique to reproduce certain strands of plants.  The cuttings will have the exact same DNA as the plant they were taken from, which is different from a plant grown from seed which takes DNA traits from two plants like a human.  Growing bonsai from cuttings is very simple and anyone can achieve great results.

1.) Trim your bonsai tree as you would normally, placing the trimmings into a bowl of water as they fall.  Only keep the cuttings that are at least 3 leaf nodes long, or have at least 3 sets of leaves.  The optimal size for most trees is five or six nodes long.  The roots will come from those leaf nodes, so it is important to ensure at least 2 nodes are in the ground.

Taking Bonsai Cuttings

2.) Remove the leaves from the bottom two leaf nodes of the cutting.  Just lightly pinch the branch and slide your fingers down.  The leaves should separate easily and can be discarded.

Trimmed Bonsai Cutting Bonsai Cutting

3.) Dip the cuttings in some rooting hormone if available, up to the second leaf node.  This is not absolutely necessary to achieve good results, but it will increase the chance of survival.   This product will help provide the nutrients the cutting needs faster.  Let the cutting soak for three to five seconds before removing.

4.) Stick the cutting straight into the dirt, 2 nodes deep if possible.  Press down on the dirt around the cutting to ensure that it will stay standing.

Stuck Bonsai Cuttings5.) Place a plastic barrier around the pot to trap in moisture.  If you are using a pot, plastic bags work well for this.  Just place the pot in the bag and tie it tight.  If you are using a tray, then a humidity dome will work well.

Growing Cuttings6.) Place your trees in a shady area so they can root.  Water them regularly, and mist the leaves if you notice that they are wilting.

Waterred Cutting7.) Check your cuttings after about a month, depending on the species, to see if they have rooted.  The best way to do this is by giving them a little tug to feel for resistance.  Once all cuttings in your container are rooted, remove the humidity dome and continue to water as normal.

8.) Repot the cuttings into separate pots next spring.  It is possible to repot them after they have rooted but the roots are very delicate and you will inevitably lose some.

Rooted Bonsai Cutting

Tips:

Humidity is the key!  Your trees will not have roots to absorb water, so they will absorb water through their leaves during this process.  I mist my cuttings every day, ensuring I see water droplets on the leaves so they are moist enough.

Once the cuttings have rooted, the large amount of humidity can cause mold issues quickly.  Remove the humidity dome as soon as cuttings are rooted.

Use a sharp knife or sheers to cut the bottom of the cuttings at an angle before sticking in the dirt.  This will make it easier to push them into the dirt.

This is best done with softwood cuttings.  These are cuttings taken while they are still green and haven’t hardened yet.  It will work with hardwood cuttings, but results may vary from softwood results.

Filed Under: Propagation Tagged With: cutting, trimming

Most Recent Posts

  • How to Choose Bonsai Pottery for Your Tree
  • How to prepare a bonsai for winter
  • “Indoor Bonsai for Beginners: Selection – Care – Training” Review
  • How To Kill Spider Mites
  • Step by step guide how to pick a pre-bonsai or nursery plant

Copyright © 2025 · Lifestyle Pro Theme on Genesis Framework · WordPress · Log in